
How to Connect to wlan0 Kali Linux in Terminal | Step-by-Step Guide
Connect wlan0 Kali Linux using the terminal is a useful skill for cybersecurity professionals, system administrators, and developers who often work directly from the command line. Kali Linux is widely used in environments where a graphical interface may not be available. In such cases, knowing how to manage wireless connections from the terminal becomes essential for accessing Wi-Fi networks quickly and efficiently.
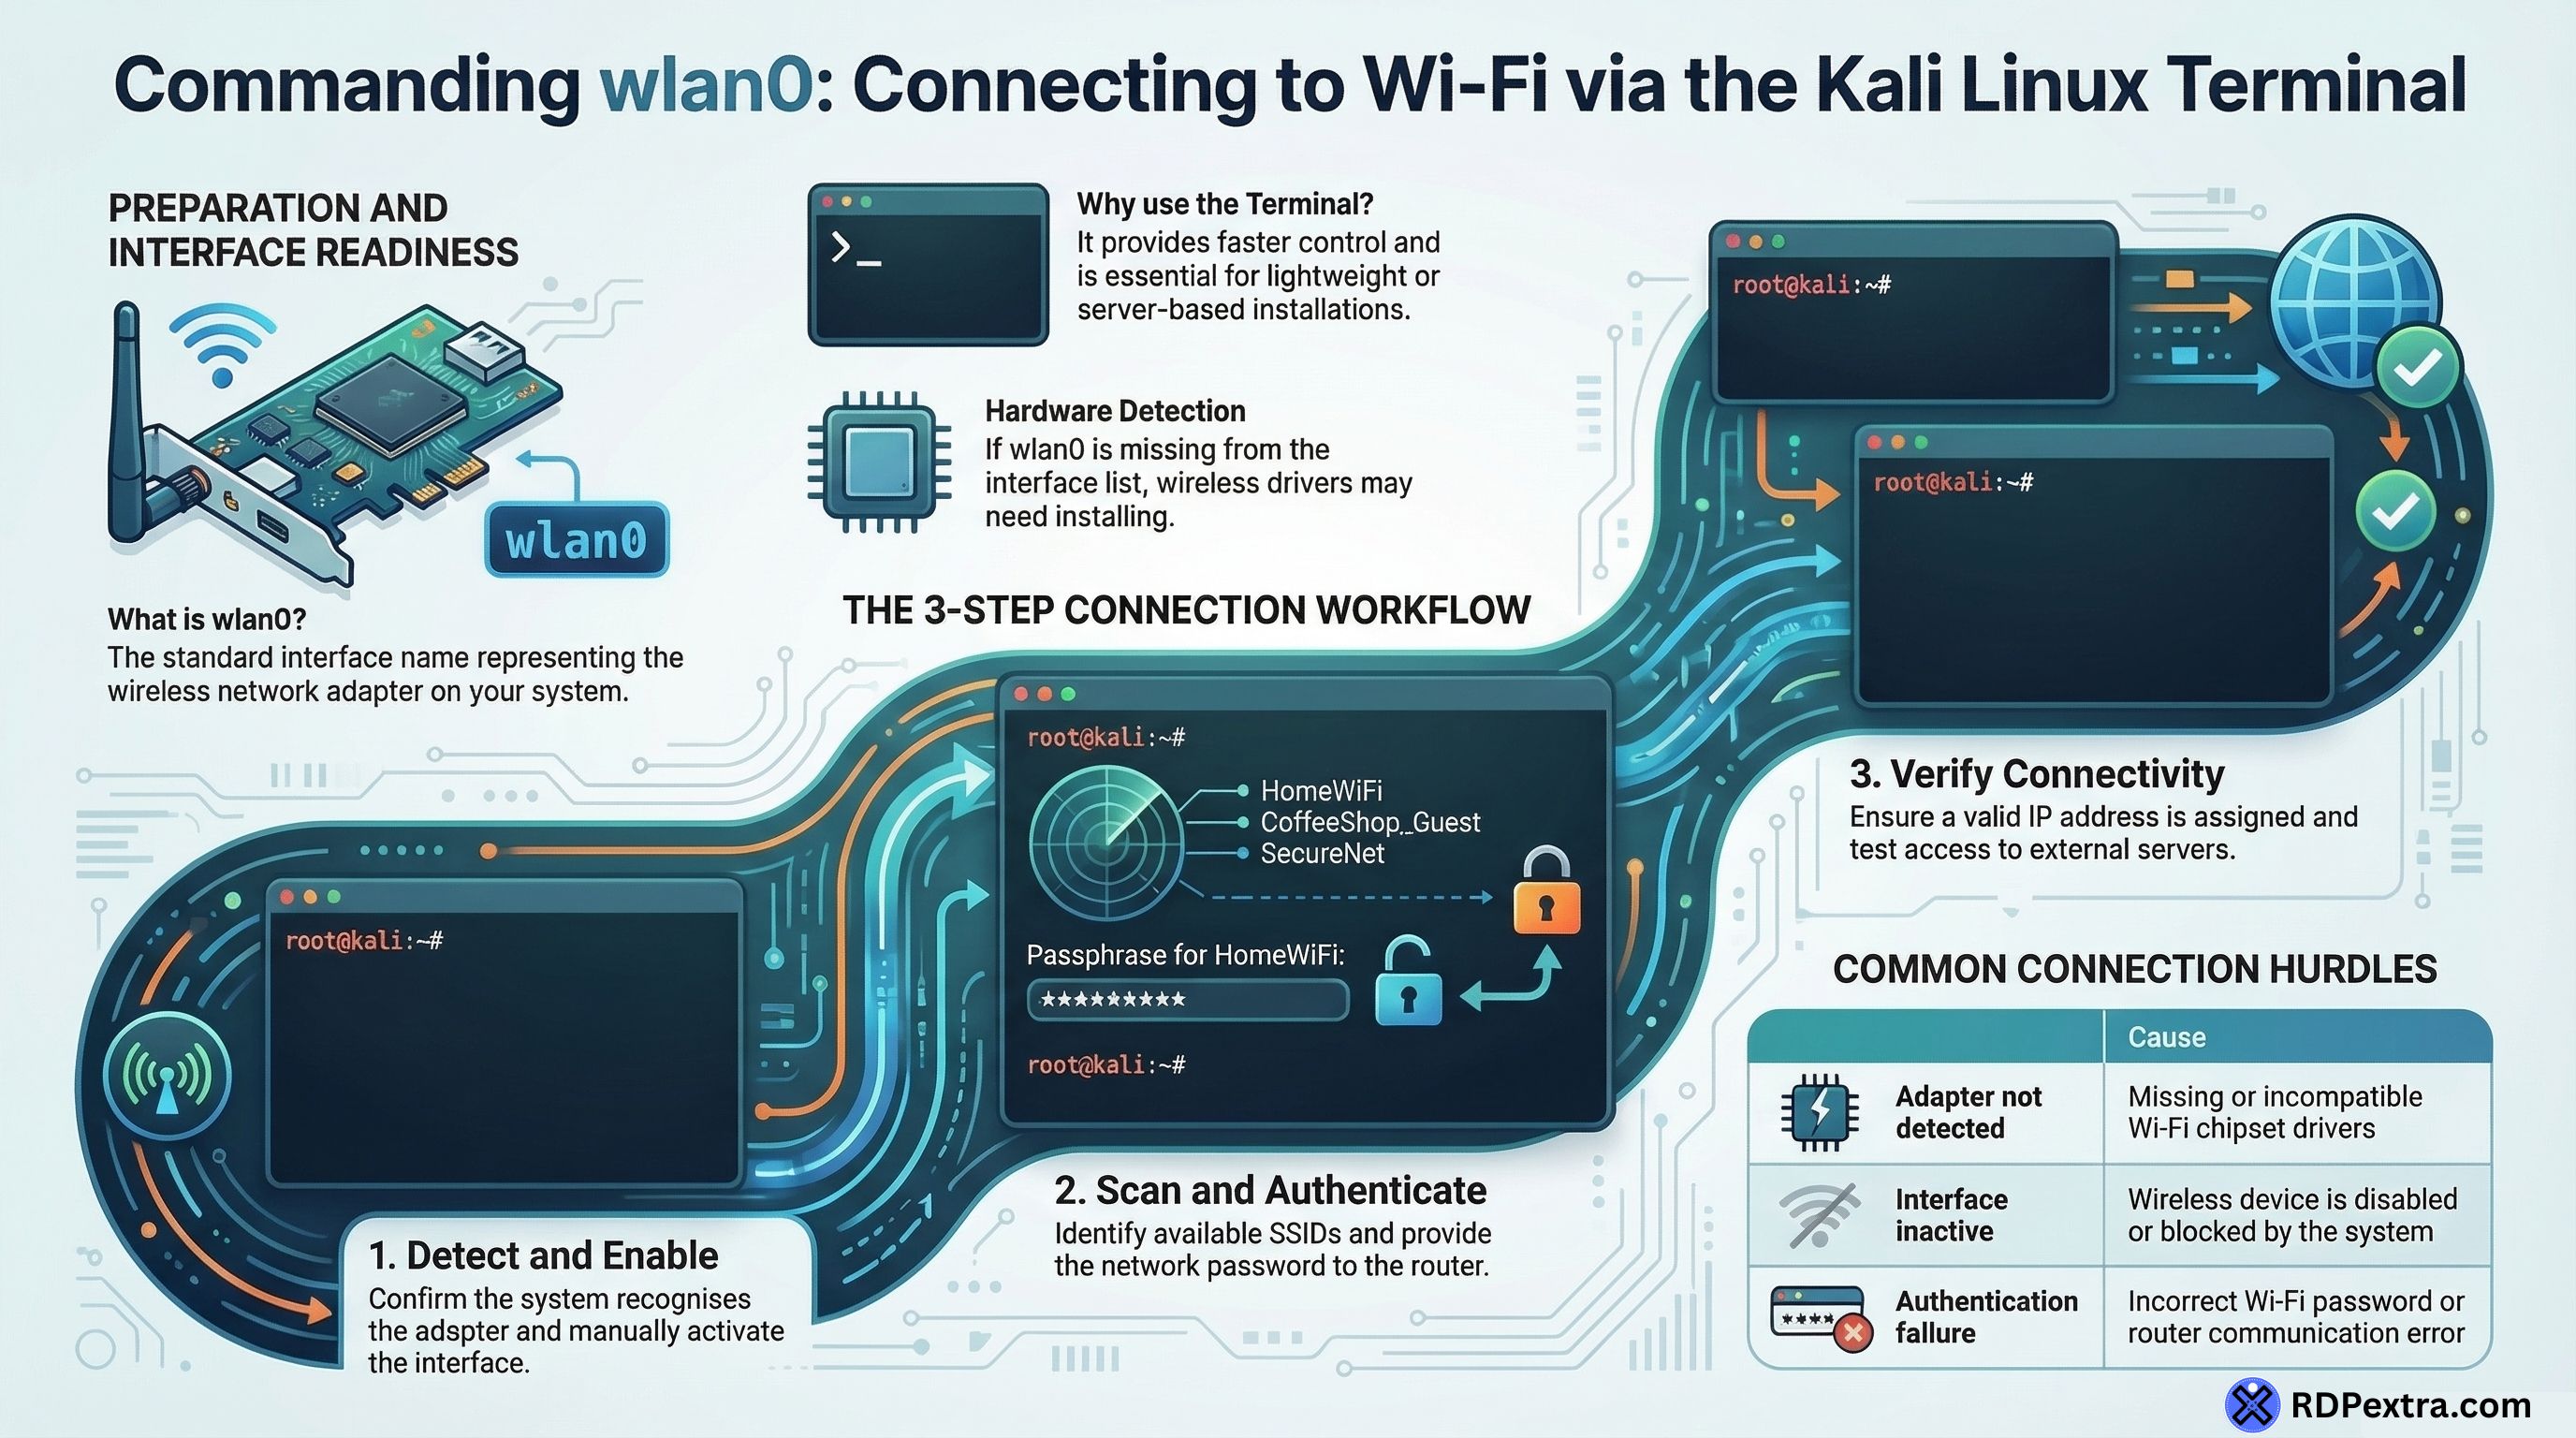
In this guide, you will learn how to connect to wlan0 Kali Linux in terminal using simple steps. This method is useful when the desktop environment is not available or when you want faster control over network connections.
What is wlan0 in Kali Linux?
In Linux operating systems, network devices are identified using interface names. The interface name wlan0 generally represents the wireless network adapter on your system.
When you connect to Wi-Fi using the terminal, Kali Linux communicates with this wireless interface. If the system detects your Wi-Fi adapter correctly, wlan0 will appear in the network interface list.
This interface is responsible for scanning nearby wireless networks and connecting your system to a Wi-Fi router.
Understanding how wlan0 Kali Linux terminal networking works helps users manage Wi-Fi without relying on graphical tools.
Why Connect to Wi-Fi Using the Terminal?
Many Kali Linux users rely on terminal commands instead of GUI tools for network management. There are several reasons why this method is preferred.
First, some Kali installations run without a graphical interface, especially on servers or lightweight systems. In such cases, the terminal becomes the only way to manage connectivity.
Second, the terminal provides more control over the network configuration. Security professionals and penetration testers often prefer terminal access when working with wireless tools.
Another reason is speed. Once you understand the process, connecting Wi-Fi from the terminal becomes faster than navigating through graphical menus.
Because of this, learning how to connect wlan0 Kali Linux through the terminal is a valuable skill.
Step 1: Check if the wlan0 Interface is Available
Before connecting to Wi-Fi, the first step is confirming that Kali Linux recognizes the wireless adapter.
When the adapter is detected, the system lists the wireless interface under the name wlan0. If the interface appears in the network list, it means the wireless driver is working correctly.
If wlan0 does not appear, the system may not detect the Wi-Fi adapter or the driver might be missing. In such cases, installing the correct wireless driver usually fixes the issue.
Once the interface is visible, you can move forward with the connection process.
Step 2: Enable the Wireless Interface
Sometimes the wireless adapter is disabled by default when Kali Linux starts. If the interface is inactive, the system cannot scan or connect to networks.
To solve this, the wlan0 interface must be enabled. Once activated, the wireless card becomes ready to communicate with nearby routers.
Enabling the interface is an essential step in the process of enable wlan0 Kali Linux networking.
After activation, the system will be able to detect nearby Wi-Fi signals.
Step 3: Scan Available Wi-Fi Networks
After enabling the wireless interface, the next step is scanning for available networks.
Kali Linux can search for nearby Wi-Fi connections and display the list of available SSIDs. Each SSID represents a wireless network that your system can connect to.
When scanning completes, you will see several networks around you. These may include home networks, office routers, or public Wi-Fi connections.
At this point, you simply select the network you want to connect to.
This process is an important part of using kali linux wifi terminal command methods to manage wireless connections.
Step 4: Connect to the Wi-Fi Network
Once you identify the network name, Kali Linux allows you to connect using the terminal.
During the connection process, the system authenticates with the router using the Wi-Fi password. After successful authentication, the router assigns an IP address to your system.
This IP address allows your device to access the internet.
When the connection completes, the wlan0 interface becomes active and begins transferring data through the wireless network.
At this stage, your system has successfully connect wlan0 Kali Linux to a wireless network.
Step 5: Verify the Connection
After connecting to Wi-Fi, it is always a good idea to verify that the network is working correctly.
If the system receives an IP address and the network is active, the connection is successful.
You should also confirm that your system can access websites or external servers. If everything works normally, the wlan0 interface is properly connected to the internet.
This step confirms that your kali linux connect to wifi terminal setup is working as expected.
Common Issues When Connecting wlan0
Sometimes users face issues when trying to connect to Wi-Fi in Kali Linux. The most common problem occurs when the wireless adapter is not detected.
Another issue happens when the wireless device is blocked by the system. This can prevent the interface from scanning networks.
Driver problems can also cause connection failures. If the Wi-Fi chipset driver is missing or incompatible, the wlan0 interface may not function correctly.
Restarting network services or reinstalling drivers usually resolves these issues.
Understanding these troubleshooting steps helps maintain a stable wlan0 Kali Linux terminal connection.
Why wlan0 is Important in Kali Linux
The wlan0 interface plays an important role in Kali Linux networking. It allows the system to communicate with wireless networks and access the internet.
For cybersecurity professionals, wlan0 is also used in wireless auditing, packet monitoring, and penetration testing environments.
Because of this, learning how to manage wlan0 using terminal commands is an important skill for Kali Linux users.
Whether you are working in cybersecurity, networking, or Linux administration, knowing how to connect wlan0 Kali Linux through the terminal will save time and improve your workflow.
Conclusion
Learning how to connect to wlan0 Kali Linux in terminal is a useful skill for anyone using Kali Linux. The process involves identifying the wireless interface, enabling it, scanning available Wi-Fi networks, connecting to a network, and verifying the connection.
Even without a graphical interface, Kali Linux provides powerful terminal tools that allow users to manage wireless networking efficiently.
Once you understand the steps, connecting Wi-Fi through the terminal becomes quick, reliable, and easy to repeat on any Kali Linux system.
Frequently Asked Questions (FAQs)
wlan0 is the wireless network interface used by Kali Linux to connect to Wi-Fi networks. It represents the system’s Wi-Fi adapter and allows the operating system to scan, connect, and communicate with wireless routers.
Many Kali Linux users prefer the terminal because it works even without a graphical interface. It also gives better control over network settings and is useful for troubleshooting wireless connectivity issues.
If wlan0 does not appear, it usually means the wireless adapter is not detected or the driver is missing. Checking hardware compatibility and installing the correct Wi-Fi driver normally resolves this issue.
Yes, Kali Linux allows users to connect to wireless networks directly from the terminal. This is especially useful for minimal installations, remote systems, or environments where the desktop interface is not available.
Connection problems can occur due to disabled wireless interfaces, blocked network devices, or incorrect drivers. Ensuring the interface is enabled and the wireless driver is properly installed usually fixes the problem.