


Have you ever noticed your PC lagging during heavy multitasking? Or perhaps you need to configure deep network settings to manage high-speed remote tasks? When generic troubleshooting steps fail, all technical roads lead to one highly powerful, centralized configuration hub: Advanced System Properties in Windows 10.
Whether you are a casual user looking to breathe new life into an aging laptop, a digital creator handling heavy rendering assets, or a power user configuring a premium Windows RDP solution for 24/7 uptime, knowing how to quickly navigate to this interface is a crucial skill.
In this comprehensive, step-by-step guide, we will break down 7 foolproof, lightning-fast methods to access this hidden control panel using everything from basic mouse clicks to advanced command-line scripts.
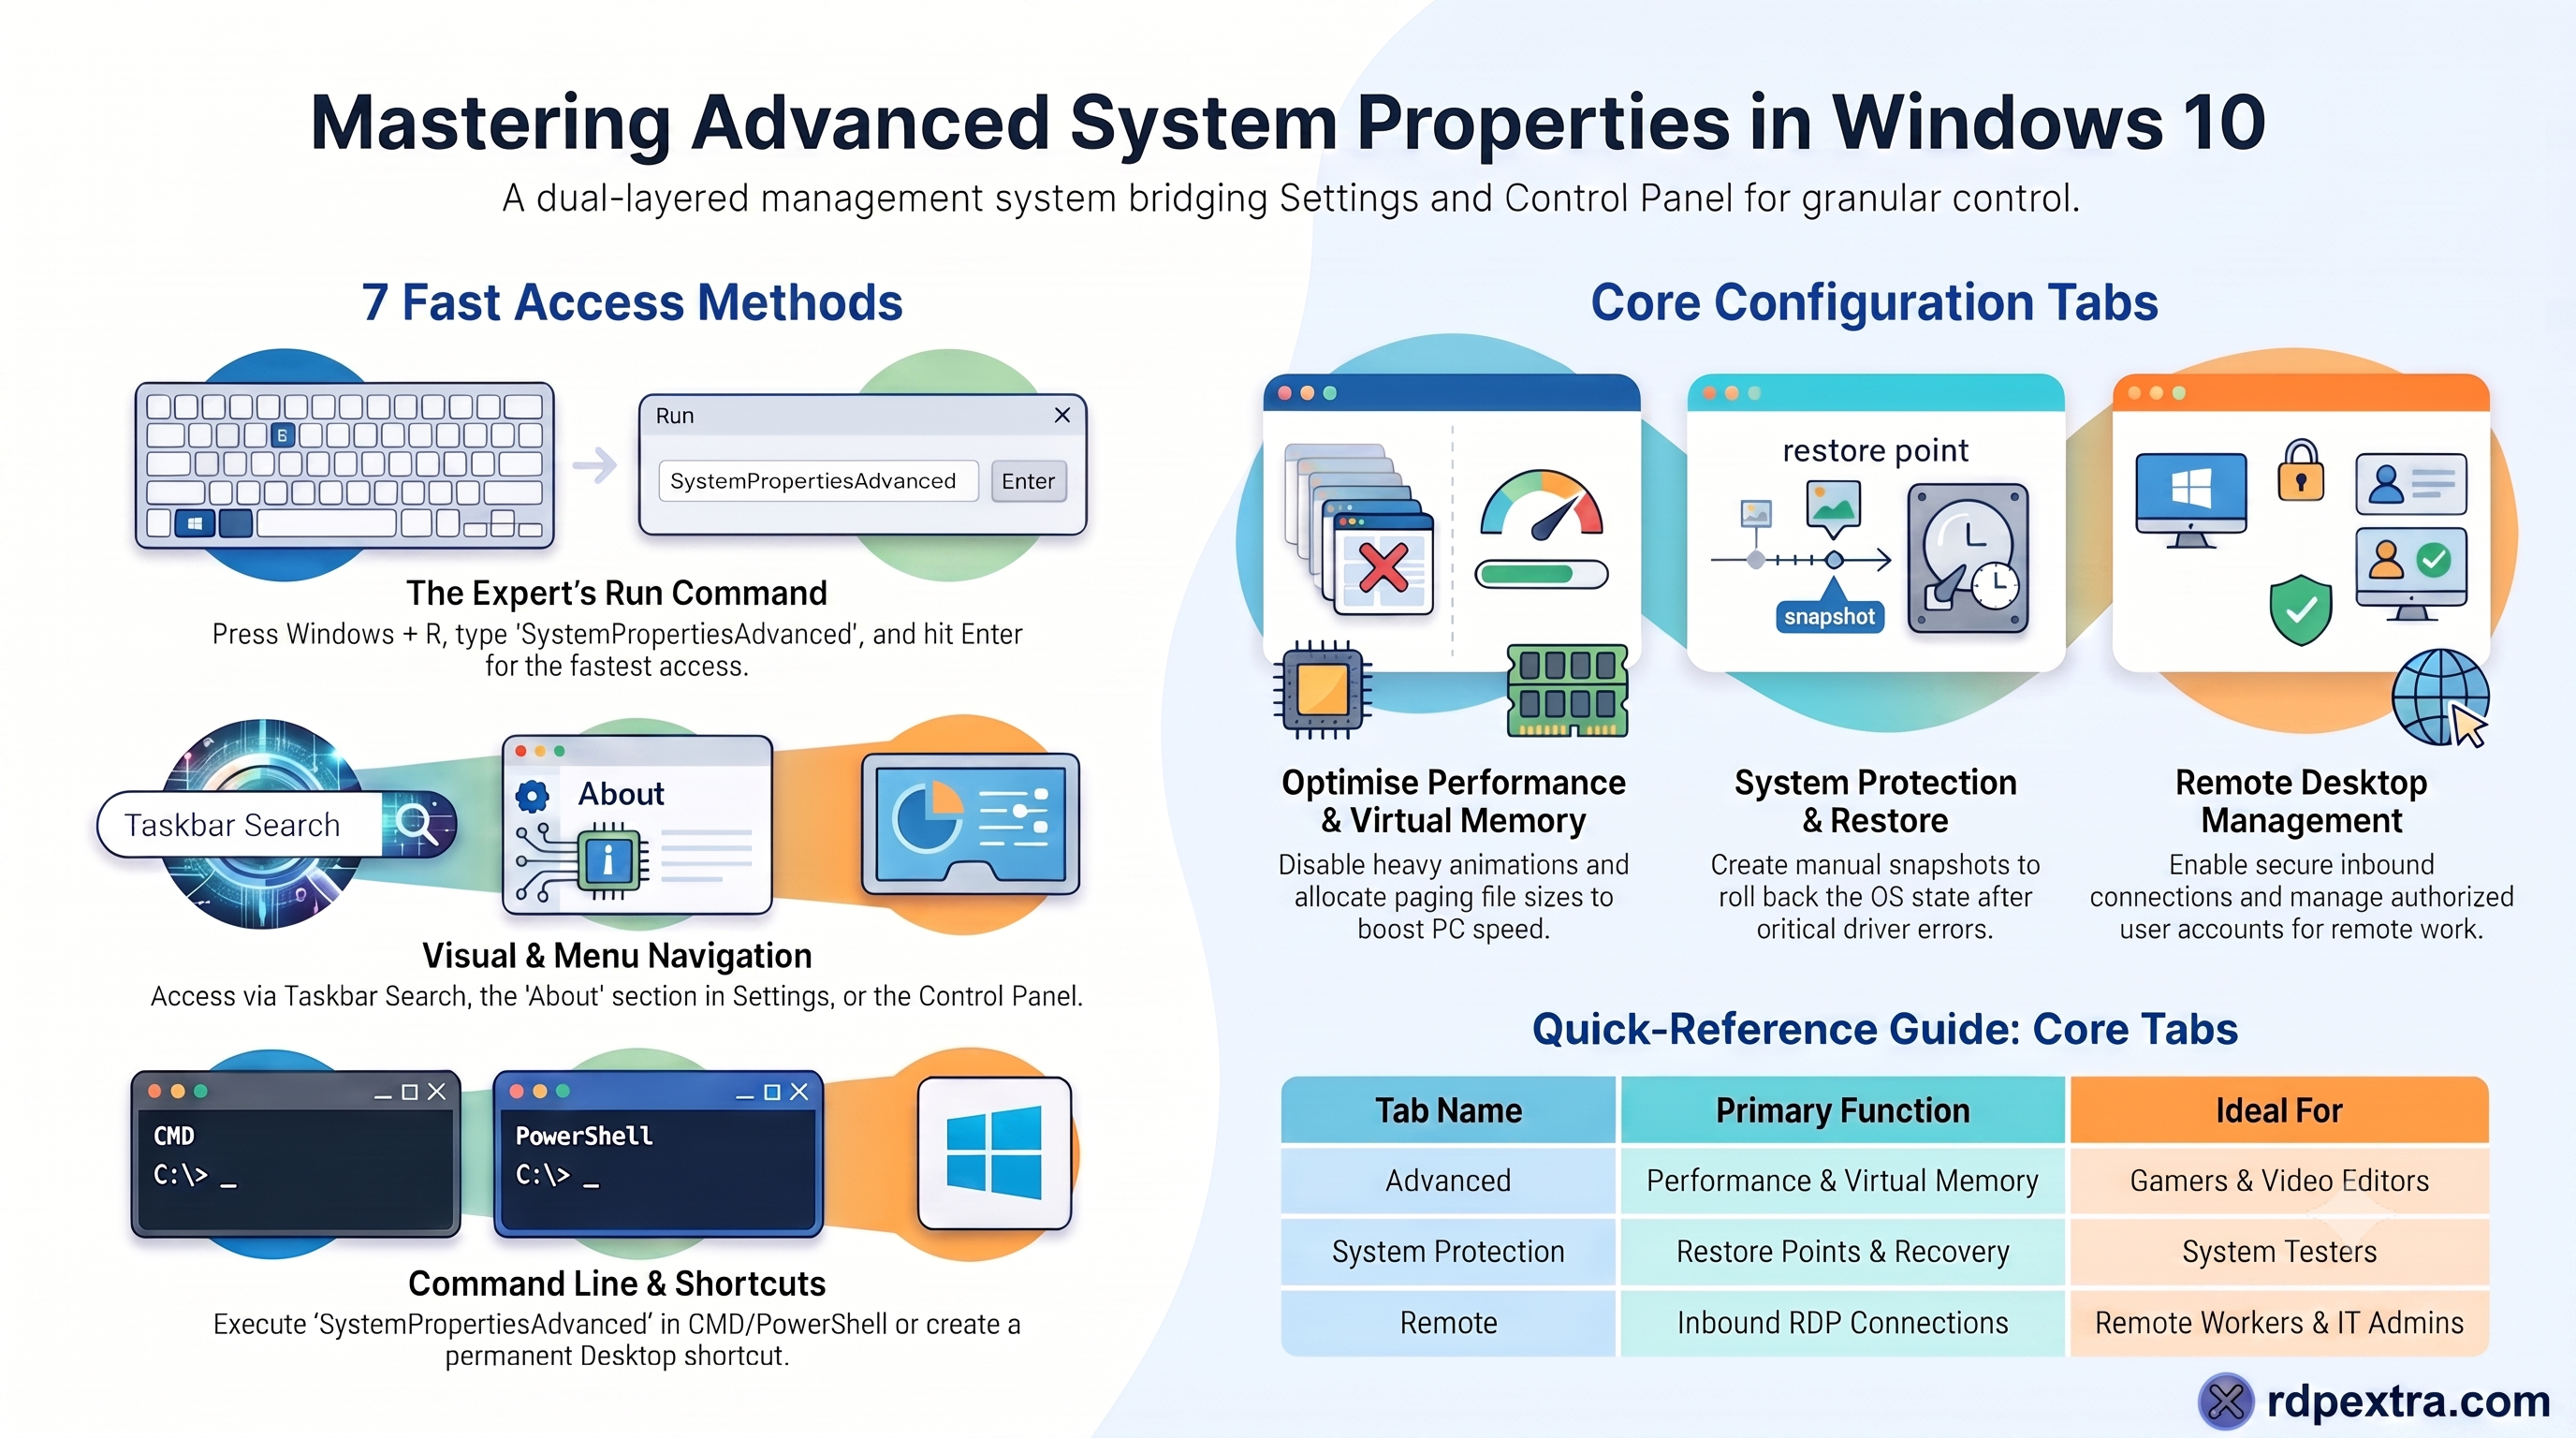
What Exactly Are Advanced System Properties in Windows 10?
Before diving into the operational side, it is vital to understand what makes this specific panel so unique. Windows 10 features a dual-layered management system: the modern, user-friendly Settings App and the legacy, deeply integrated Control Panel.
The Advanced System Properties in Windows 10 interface bridges these two environments. It provides direct, granular access to low-level operating system configurations that dictate how your machine handles memory, user data, network identity, and emergency recoveries.
When you open this window, you gain access to five core operational tabs:
- Computer Name: Manage system identification, network descriptions, and local workgroup or domain memberships.
- Hardware: Access the Device Manager and adjust device installation settings.
- Advanced: This is the core hub. It houses sub-menus for system performance optimization, user profile data allocations, startup preferences, and system crash recovery behaviors.
- System Protection: The dedicated home for your System Restore settings, allowing you to configure recovery points and manage allocated disk spaces.
- Remote: The essential panel to configure secure inbound and outbound connections via Remote desktop settings Windows 10.
Let’s dive into the 7 definitive methods to open this powerhouse panel.
Method 1: The Blazing-Fast Run Command (Expert Choice)
If speed is your absolute priority, using the native Run dialog box is the ultimate shortcut. It completely bypasses the visual clutter of the modern Windows UI and launches the panel instantly.
Step-by-Step Instructions:
- Press the Windows Key + R shortcut on your keyboard to trigger the Run dialog window.
- Inside the open text field, type the following exact system command:
SystemPropertiesAdvanced - Press Enter or click the OK button.
Plaintext
Run Command Shortcut: Win + R ➔ SystemPropertiesAdvanced ➔ Enter
Why This Method Excels:
This method is universally loved by IT professionals because it goes straight to the point. It doesn’t just open the System Properties panel; it forces Windows to open it with the Advanced tab already selected, saving you valuable clicks.
Method 2: Use Taskbar Search or Cortana
If you prefer a visual, mouse-driven approach but still want rapid results, the built-in Windows 10 Taskbar search function is your best friend.
Step-by-Step Instructions:
- Click directly inside the Search Bar on your Windows Taskbar (or press Windows Key + S).
- Type the phrase:
View advanced system settings - The system will process your request using semantic search. Click on the top matching result labeled View advanced system settings (marked as a Control Panel item).
Pro Tip: Thanks to Windows 10’s intelligent search indexing, you don’t even need to type the full phrase. Simply typing “advanced system settings” or “environment variables” will bring up the exact same control panel shortcut.
Method 3: Navigate via the Classic Control Panel
For long-time OS users who prefer the traditional, structural navigation paths of older Windows iterations, the classic Control Panel remains fully functional.
Step-by-Step Instructions:
- Open the Start Menu, type
Control Panel, and hit Enter. - Set your “View by” option in the top right corner to Large icons or Category.
- Navigate to and click on System and Security, then select System.
- Look at the left-hand contextual sidebar menu and click on the link titled Advanced system settings.
This classic path ensures that you can review broader system parameters, check active security protocols, or hop into network sharing configurations concurrently.
Method 4: Execute via Command Prompt (CMD) or PowerShell
For system administrators, developers, or automation enthusiasts running heavy automation scripts on a botting RDP, launching system panels via a command-line interface (CLI) is standard practice.
Step-by-Step Instructions:
- Right-click the Start button and select either Command Prompt or Windows PowerShell.
- Once the console terminal window initializes, type the following case-insensitive command string:
SystemPropertiesAdvanced - Hit Enter on your keyboard.
The execution handles the call instantly. This exact command can also be embedded directly into custom deployment scripts or IT automation workflows to configure massive groups of remote network nodes simultaneously.
Method 5: Utilize the Modern Windows 10 Settings App
As Microsoft continues to migrate classic management tools over to its streamlined, modern UI, they have left a direct access link right inside the primary consumer settings page.
Step-by-Step Instructions:
- Open the primary configuration panel by pressing Windows Key + I on your keyboard.
- From the main grid of options, click into the System category.
- Scroll all the way down the left-side navigation column and select the About tab.
- On the right-hand side of the screen, locate the Related settings header, and click the link labeled Advanced system settings.
Method 6: Create a Permanent Desktop Shortcut
If your daily operational workflow requires you to constantly adjust Environment variables Windows 10 or manage active user profiles, setting up an easily accessible desktop shortcut can save significant time over the course of a work week.
Step-by-Step Instructions:
- Minimize your active windows to view your clean desktop. Right-click on an empty space, then choose New ➔ Shortcut.
- Under the field labeled “Type the location of the item:”, input:
SystemPropertiesAdvanced - Click Next.
- Name your new shortcut something instantly recognizable, such as
Advanced System Settings. - Click Finish.
Now, you have a dedicated, permanent launcher icon directly on your desktop screen. For even faster access, you can right-click this new icon and select Pin to Taskbar or Pin to Start.
Method 7: The Contextual Right-Click on ‘This PC’
This is the classic, original method used by generations of Windows power users to quickly check hardware properties and toggle advanced underlying system parameters.
Step-by-Step Instructions:
- Open up File Explorer (Shortcut: Windows Key + E).
- In the left navigation tree, locate the icon labeled This PC.
- Right-click on This PC and select Properties from the bottom context menu.
- From the resulting settings window, click the Advanced system settings link located in the sidebar menu.
Quick Fix: If you cannot find the “This PC” icon anywhere on your desktop layout, right-click an empty space on your desktop ➔ select Personalize ➔ click Themes ➔ navigate to Desktop icon settings ➔ check the box next to Computer ➔ click Apply.
Core Operations Inside Advanced System Properties
Once you have successfully used one of our 7 methods to access Advanced System Properties in Windows 10, what exactly can you achieve inside it? Let’s take a detailed look at the core functions available.
1. Optimizing Performance and Virtual Memory
Inside the “Advanced” tab, clicking the “Settings” button under the Performance section opens up a deep performance tuning environment. Here, you can selectively disable heavy operating system visual animations, window shadows, and font anti-aliasing features to significantly accelerate older hardware configurations or optimize an Android emulator RDP for smoother app testing. Furthermore, the “Advanced” sub-tab houses your configurations for Virtual memory Windows 10, allowing you to allocate custom paging file sizes on your high-speed SSDs to act as supplementary physical RAM during intensive workloads.
2. Safeguarding with System Restore Settings
The “System Protection” tab gives you absolute control over your local System Restore settings. You can easily create manual, timestamped snapshots of your operating system state prior to installing new drivers, registry tweaks, or major updates. If your system encounters a critical blue-screen error or driver conflict, you can quickly roll your entire PC’s state back to an earlier, completely stable configuration point.
3. Configuring Remote Desktop Settings Windows 10
The “Remote” tab acts as the gateway for remote access management. If you need to dial into your machine while on the go or manage specialized tasks via a residential proxy ecosystem using a real residential RDP VPS, this is where you can enable inbound connections, manage network-level authentication, and explicitly add authorized user accounts.
| Feature Tab | Primary Use Case | Target Audience |
| Performance Settings | Disable UI animations, modify Virtual memory Windows 10 | Gamers, video editors, legacy PC users |
| System Protection | Manage recovery points, adjust System Restore settings | General users, system testers |
| Remote Configuration | Set up incoming Remote desktop settings Windows 10 | Remote workers, IT admins |
| Environment Variables | Edit PATH variables, manage developer paths | Software developers, programmers |
Conclusion
Mastering the use of Advanced System Properties in Windows 10 gives you complete control over your computer’s underlying behavior. Whether you prefer using the quick System Properties Run command or creating a dedicated shortcut icon on your desktop, you now have 7 reliable ways to open this essential control panel. Keep this guide bookmarked so you can easily optimize performance, safeguard your files, and access your system configurations whenever the need arises.
Frequently Asked Questions (FAQs)
The absolute fastest and most direct method is using the native Run dialog box. Simply press Win + R on your keyboard, type SystemPropertiesAdvanced into the text field, and hit Enter. This specific system command completely bypasses all intermediate menus and takes you straight to the active Advanced tab instantly.
If you cannot open this panel, it is usually due to a lack of sufficient administrative privileges. If you are using a work computer or a managed network, corporate Group Policies may actively restrict user access to deep system tools. To open it, you must be logged into a Windows account that has local Administrator permissions.
To modify your paging file allocations, launch the Advanced System Properties panel and click the Settings button under the Performance section. From there, switch to the internal Advanced tab and click the Change button under the Virtual memory block. Uncheck the automatic management box to assign a custom structural size suited to your hardware needs.
Yes, significantly. By navigating to the Visual Effects settings within this panel and selecting “Adjust for best performance,” Windows disables system-wide animations, transparency grids, and window shadows. This frees up core processing cycles and system RAM, directly boosting frame rates and responsiveness on standard setups as well as heavy virtual servers.
You can instantly trigger the primary System Information interface by pressing the Windows Key + Pause/Break key combination on your keyboard. Once that modern window initializes, you can click the Advanced system settings link located in the contextual menu to open your deep configuration controls.
Related Reading
